Blu-ray Ripper is an easy-to-use program, which just needs several clicks to complete the conversion. Find below a basic flow of Pavtube Blu-ray Ripper:
Free download Blu-ray Ripper:


Step 1. Adding Files
1. Import DVD/ Blu-ray Disc by clicking the Load disc icon, load BD/ DVD folder by clicking Add Folder icon, and DVD ISO by IFO/ISO icon.
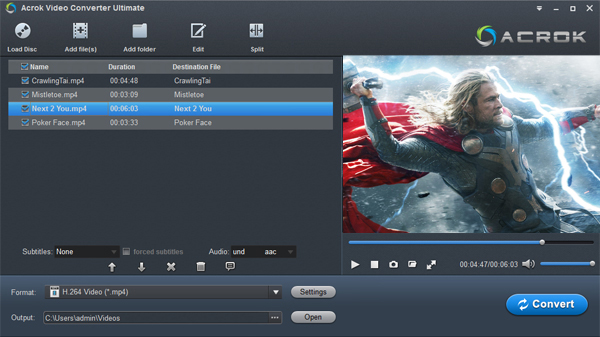
2. Click the “Edit” button to adjust the videos for your requirement.
3. Click on the "Format" bar and select the format you need.
Click on the "Format" bar to set output format. When the profile list pops up, you can select desired video/audio format from the list.
Tip: To further customize the output format, please click “Settings” button and adjust advanced video/ audio parameters.
4. Click the "Convert" button to start conversion.Crop Video
The "Crop" facility helps to get rid of the black edges and unwanted area of the image.
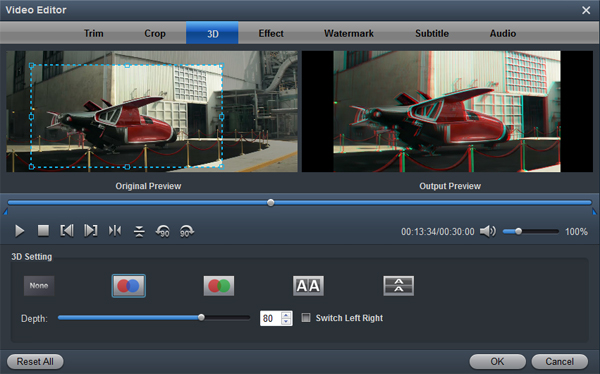
Switch to “Crop” tab, and follow either of the below methods to crop selected video:
a. Crop video by dragging and dropping the crop frame
Simply move your mouse cursor to drag and adjust the four corners of the green frame to desired position.
b. Crop video by setting values
Under Crop tab there are four value fields: Left, Top, Width and Height. You can either type in specific values in the fields or adjust slider to constrict the area you want to remain.
Trim Video
The"Trim" feature allows users to decide where to start and where to end when converting the selected clip, so that unwanted segments will be cut out after conversion.
To trim a video, please switch to“Trim” tab in Video Editor Interface and follow any of the following methods:
- a.Drag the control strip (slider) to include the segment you want to remain.
- b.Or click the left square bracket to set start point, and click the right square bracket to set end point when previewing the video.
- c.Or input specific value in Start and End box.